


Achieve a Showroom Shine: Clean Your Car Like a Pro
Posted on 04/09/2025
Achieve a Showroom Shine: Clean Your Car Like a Pro
Everyone loves the allure of a brand new car, sparkling on the showroom floor. But over time, dust, dirt, and the elements can dull that once-gleaming finish. Luckily, you don't need to be a professional detailer to restore your car's luster. By following a few expert tips and techniques, you can clean your car like a pro and achieve a showroom shine right at home.
Why a Showroom Shine Matters
Maintaining a pristine, glossy finish isn't just about aesthetics--regular, quality
car cleaning
can help protect your vehicle's paintwork, enhance longevity, and even preserve resale value. A thorough cleaning routine also makes your car more enjoyable to drive and ride in, ensuring every journey starts with sparkling confidence.
The Essentials: Must-Have Car Cleaning Supplies
Before embarking on your mission to achieve a showroom shine, gather the right supplies. Professional detailers use specialized products to create that iconic, flawless finish. Here's what you'll need:
- Pails/Buckets: At least two - one for clean water, one for rinse water.
- pH-balanced car shampoo: Gentle on your paint and effective on dirt.
- Premium microfiber wash mitts and towels: Prevents swirls and scratches.
- Soft-bristled brushes: Ideal for wheels, vents, and crevices.
- Wheel cleaner and tire shine: Complete that detailer's touch.
- Clay bar kit: Removes embedded contaminants for an ultra-smooth finish.
- Car polish and wax/sealant: For protection and deep gloss.
- Glass cleaner: Streak-free, sparkling windows.
- Interior cleaner: Safe for all surfaces.
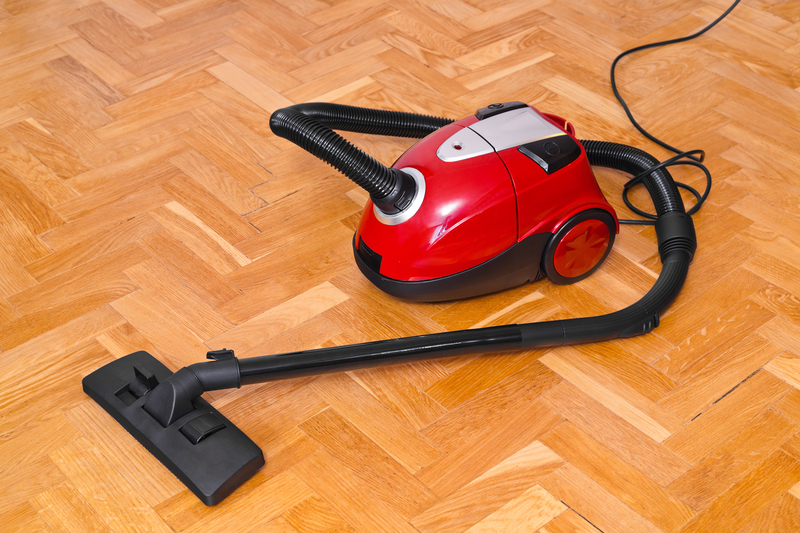
- Vacuum cleaner: Essential for carpet and upholstery.
Pro Tip:
Never use household cleaners or dish soap on your car's paint--they can strip wax and damage the finish.
Step-by-Step Guide: Car Cleaning Like a Professional
Step 1: Pre-Wash Inspection and Preparation
Pick a cool, shaded spot to wash your car; avoid direct sunlight to prevent soap and water spots. Remove all personal items from the cabin and trunk.
Inspect the surface for tar, sap, or stuck debris--these will need extra attention during the wash process to prevent scratching.
Step 2: Cleaning the Wheels and Tires First
Professional cleaners always start with the dirtiest parts--the wheels and tires.
- Spray a wheel cleaner specifically formulated for your rim type. Allow it to dwell but not dry.
- Agitate with a soft-bristled brush to loosen brake dust and grime from nooks and crannies.
- Use a separate mitt or brush for the tires and wheels--never use this on the paint.
- Rinse thoroughly.
Step 3: Thorough Exterior Wash--The Two-Bucket Method
Achieving a true showroom shine starts with a swirl-free wash. The professional choice is the two-bucket method:
- Fill one bucket with car shampoo and water, the other with clean rinse water.
- Use your microfiber wash mitt, dunk in soapy water, and wash a small section at a time--usually top to bottom.
- After each pass, rinse the mitt in the clean water bucket. This removes dirt, keeping it from scratching your paint.
- Rinse the car frequently to prevent soap from drying.
Step 4: Rinsing and Drying
Rinse the car thoroughly from top to bottom with a gentle spray. Inspect for leftover grime and repeat if needed.
Dry the car immediately with clean, high-quality microfiber towels or a dedicated car dryer to prevent water spots.
Never let your vehicle air dry in the sun, as minerals in water can etch the paint.
Step 5: Claying
To create the foundation for a showroom finish, professionals use a clay bar to pull embedded contaminants from the surface, leaving it glassy smooth.
- Lubricate the surface with clay lubricant or a quick detail spray.
- Gently rub the clay bar over the paint in a back-and-forth motion until it glides effortlessly.
- Wipe off residue with a microfiber towel.
Step 6: Polishing for Maximum Gloss
Polishing removes minor swirls, oxidation, and stains, dramatically enhancing depth and reflection.
- Apply polish to a foam or microfiber applicator or a dual-action polisher.
- Work in sections, using light to moderate pressure.
- Buff off the residue after the polish hazes.
- Always use a dedicated, clean towel for removal.
You can skip this step if your car's paint is in excellent condition, though it's crucial for a true high-gloss, professional result.
Step 7: Protecting Your Shine--Wax or Sealant
The secret to that showroom car shine is protection. Using a quality wax or synthetic paint sealant will:
- Lock in the gloss and depth created by polishing.
- Shield your paint from UV, pollution, and road grime.
- Make future washes easier--the surface becomes slick and hydrophobic.
Apply your choice of wax or sealant in thin, even layers. Allow to haze, then buff off gently for a dazzling, mirror-like finish. Remember to treat trim and plastic with a dedicated protectant for that "just detailed" appearance.
Interior Detailing: Bringing the Showroom Feel Inside
Don't neglect the interior--true professionals know a clean interior is just as important as a freshly polished exterior. Here's how to get that fresh, luxurious feel:
Step 1: Clear Out and Vacuum
- Remove mats, trash, and personal belongings.
- Use a crevice tool on your vacuum to attack all nooks and seams (under seats, between cushions, and door pockets).
- Lift floor mats, vacuum thoroughly, and clean mats with appropriate cleaners.
Step 2: Clean and Condition Surfaces
- Use a gentle, non-greasy interior cleaner for dashboards, door panels, and hard surfaces.
- For leather, choose a cleaner and conditioner designed for automotive leather--a must for longevity and comfort.
- Clean vents and crevices with a soft brush or compressed air.
Step 3: Streak-Free Glass and Mirrors
- Spray glass cleaner on a microfiber towel (not directly on the glass to avoid overspray).
- Wipe all windows and mirrors inside and out for crystal clarity.
Step 4: Final Touches
- Add a subtle air freshener or odor eliminator for long-lasting freshness.
- Double-check all surfaces for missed spots and buff lightly for that flawless finish.
Extra Tips for a Professional Showroom Shine
- Work from top to bottom: Dirt runs down, so begin with the roof and finish with lower panels and tires.
- Always use clean towels: Reusing dirty ones can introduce scratches and dullness.
- Invest in quality products: High-end microfibers, pH-neutral soaps, and reputable waxes are worth every penny.
- Rotate supplies: Separate mitts and towels for different parts (paint, wheels, interior).
- Don't forget the details: Clean badges, chrome trim, exhaust tips, and door jambs.
- Maintain regularly: The more often you clean, the easier it gets--and the better your car will look overall.
Common Mistakes to Avoid When Cleaning for a Showroom Shine
- Washing in direct sunlight: Causes water spots and streaks, making your efforts less effective.
- Using dish soap or abrasive household cleaners: Strips protection and may damage modern clear coats.
- Reusing sponges or cloths with embedded grit: This can scratch paint, leaving costly swirl marks.
- Skipping clay or polish on neglected paint: Fails to remove bonded contaminants and oxidation.
- Applying too much or too little wax: More isn't better--a thin, even layer is key. Too little, and you lose durability and shine.
- Forgetting to treat rubber, plastic, and trim: These parts fade and weather without protection.
Maintaining That Showroom Car Shine
A great clean doesn't last forever, but proper maintenance routines will keep your car shining for months.
- Use a quick detailer or spray wax between washes to boost gloss and protection.
- Wash your car every 1-2 weeks, especially in harsh climates.
- Reapply wax or sealant every 3-6 months depending on use and conditions.
- Keep a microfiber towel in your car for instant touch-ups of fingerprints or bird droppings.
- Vacuum and wipe down interior surfaces regularly to preserve that "new car" feeling.

Frequently Asked Questions About Achieving a Showroom Shine
1. How often should I clean my car for a showroom finish?
Ideally, perform a basic wash every week or two. For a full detail with clay, polish, and wax, every 3-6 months is recommended, but frequency depends on driving and storage habits.
2. Is it worth investing in a dual-action polisher?
Absolutely! While hand application works, a dual-action polisher provides consistent results, removes swirls more efficiently, and leaves your car looking better than most professional details.
3. Can I get a showroom shine on older or neglected vehicles?
With patience and the right approach--including paint correction steps--the results can be remarkable, though some paint imperfections may require professional intervention.
4. What's the difference between wax, sealant, and ceramic coating?
- Wax: Natural shine, lasts a few months, easy to apply.
- Sealant: Synthetic protection; lasts longer (~6 months) and offers slicker results.
- Ceramic coating: Long-term, semi-permanent solution applied professionally; super hydrophobic and scratch-resistant.
Conclusion: Your Car Can Shine Like Showroom New
Achieving a showroom shine on your car isn't just a dream reserved for professionals. With the right tools, products, and patience, you can clean your car like a pro and enjoy that fresh-from-the-dealer look every day. Not only will your vehicle turn heads, but you'll also protect your investment and enjoy every mile in style.
So, roll up your sleeves--the keys to a lasting, gleaming finish are now at your fingertips. Start your journey to a showroom-worthy shine and transform your car into an automotive masterpiece today!